I remember sitting on my living room floor back in my old apartment in Portland, surrounded by expensive, mass-produced pillows that felt completely soul-less. They looked fine on a Pinterest board, but they didn’t make my space feel like home. I realized then that we often fall into the trap of thinking that professional-grade decor requires a degree in interior design or a massive budget, but that’s just not true. Learning how to make cushion covers isn’t actually about achieving perfection or following rigid, intimidating patterns; it’s about the meditative joy of creating something tactile and beautiful with your own two hands.
In this guide, I’m stripping away the overwhelming jargon and the complicated sewing tutorials that leave you feeling more stressed than inspired. I’m going to walk you through a straightforward, soulful process that focuses on intentional crafting rather than perfectionism. You’ll learn the essential techniques to transform simple fabric into cozy accents that reflect your unique energy. Whether you’re a total beginner or just looking to slow down and reconnect through a creative hobby, I promise these steps will help you build a sanctuary that feels truly yours.
Table of Contents
- Step-by-Step Instructions
- Choosing Meaningful Fabric Types for Upholstery and Comfort
- Mastering the Perfect Cushion Cover Pattern Tutorial
- Little Rituals for a Flawless Finish: My Top 5 Tips for Soulful Sewing
- Bringing Intention to Your Craft
- ## The Soul in the Stitch
- Creating Your Own Soft Sanctuary
- Frequently Asked Questions
Guide Overview
Tools & Supplies
- Sewing machine for joining fabric edges
- Fabric scissors for precise cutting
- Measuring tape for accurate dimensions
- Pins to hold fabric in place
- Fabric (approx. 1 yard depending on size)
- Thread (1 spool matching fabric color)
- Sewing machine needles (universal size)
- Chalk or fabric marker for marking lines
Step-by-Step Instructions
- 1. First, we need to gather our intentions and our supplies. You’ll want to find a fabric that feels soulful to the touch—think soft linens or organic cottons that invite you to sink into your sofa. Beyond the fabric, make sure you have a sharp pair of fabric scissors, some high-quality thread that matches your color palette, measuring tape, pins, and your sewing machine. Having everything laid out before you start is a wonderful way to practice mindfulness and prevent that frantic, rushed feeling.
- 2. Once your materials are ready, it’s time to measure and cut. For a standard cushion, take your existing pillow insert and measure its height and width. Add about an extra inch to each side for your seam allowance; I always tell my clients that giving yourself a little extra room is a metaphor for life—it prevents things from feeling too tight or stressful! Use your fabric chalk to mark these dimensions clearly before cutting your fabric pieces.
- 3. Now, let’s prepare the edges. If you’re working with a fabric that tends to fray, like some of the beautiful linens I love, you might want to do a quick zigzag stitch along the cut edges. This small act of preventative care ensures your cushion stays beautiful for years to come. If you’re feeling a bit more adventurous, this is also a lovely moment to sew on a delicate trim or lace to add a touch of personal texture.
- 4. It’s time to bring the pieces together. Place your two fabric pieces with the patterned sides facing each other—this is called “right sides together.” Pin the edges carefully, ensuring your corners are aligned. As you sew, try to focus on the rhythmic hum of the machine; it can be incredibly meditative if you allow yourself to just be in the moment. Stitch along your marked seam allowance, leaving one side open so we can turn it right-side out later.
- 5. With the sewing complete, find that open side and gently turn the cover inside out. This is the most satisfying part! Use a blunt tool, like a chopstick or a knitting needle, to carefully push out the corners. Taking the time to make sure those corners are crisp and defined is what separates a rushed project from a piece of art that truly brings peace to your living space.
- 6. Finally, slide your pillow insert into its new home. If the cover feels a little loose, you can give it a gentle tug to settle the fabric. I like to finish the process by taking a deep breath and placing the cushion in its spot in your home. You haven’t just made a home accessory; you’ve created a small, tangible piece of sanctuary that you built with your own two hands.
Choosing Meaningful Fabric Types for Upholstery and Comfort
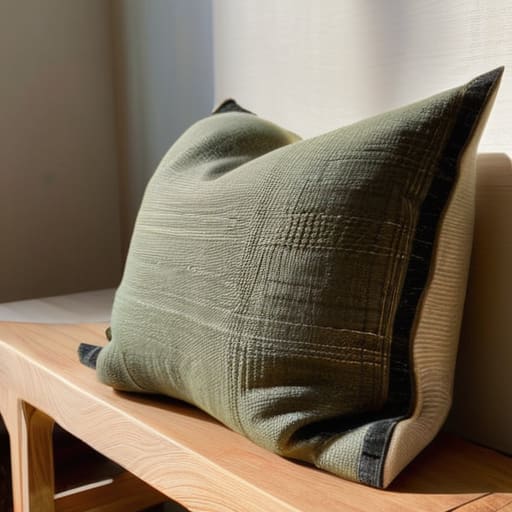
When you’re selecting materials, I always encourage you to think beyond just the color or the pattern. I remember back in my corporate days, I used to decorate my office with textures that felt grounding—it actually helped lower my stress during frantic afternoons! When exploring different fabric types for upholstery, consider how the weight of the textile will interact with your space. A heavy linen or a sturdy cotton canvas offers a sense of structure and longevity, making them perfect for high-traffic areas like a cozy reading nook.
Texture plays such a vital role in how a room feels to our nervous system. If you’re aiming for a sanctuary of calm, soft velvets or brushed cottons can invite a sense of gentle comfort. Just a quick tip from my own sewing mishaps: always ensure your chosen fabric has a bit of durability before you start measuring cushion inserts. You want a material that hugs the insert snugly without feeling strained. Choosing the right textile isn’t just about aesthetics; it’s about intentionality and creating a tactile experience that truly supports your well-being.
Mastering the Perfect Cushion Cover Pattern Tutorial
When you finally sit down with your shears and chalk, it’s easy to feel a bit of “project paralysis.” I remember my first attempt at this back in my tiny apartment in Portland; I was so nervous about ruining my favorite linen that I nearly froze up! To avoid that, I always recommend treating your cushion cover pattern tutorial as a rhythmic practice rather than a rigid set of rules. Before you cut anything, take a deep breath and double-check your dimensions. A little secret from my days in corporate wellness? Precision in the preparation phase prevents so much stress during the actual execution.
One area where people often stumble is the transition from paper to cloth. If you’re working with heavier textiles, pay close attention to your sewing machine settings for fabric; a tension that’s too tight can cause that dreaded puckering we all dread. I also find that marking your seam allowances with a fine tailor’s chalk helps maintain that intentional, professional flow. Think of these measurements not as constraints, but as the gentle boundaries that allow your creativity to truly flourish.
Little Rituals for a Flawless Finish: My Top 5 Tips for Soulful Sewing
- Don’t rush the prep work—I know it’s tempting to dive straight in, but pressing your fabric with a warm iron before you even touch the scissors is a game-changer. It smooths out those tiny tensions and ensures your lines are as clean and calm as your morning meditation.
- Give yourself a little “breathing room” by adding a generous seam allowance. I used to make my covers too tight, which made the corners look stressed; adding an extra half-inch ensures the cushion sits plump and happy rather than stretched thin.
- Embrace the magic of a heavy-duty needle. If you’re working with those beautiful, textured linens we talked about, a standard needle might struggle, so switching to a denim or universal needle will make the whole process feel much more fluid and less like a battle against your machine.
- Remember that imperfections are just part of the story. If a stitch isn’t perfectly straight, don’t let it steal your peace. In the world of slow crafting, a tiny variation is just a reminder that a human hand—and a human heart—made this piece.
- Always, always test your zipper or button closure on a scrap piece of your chosen fabric first. It’s a small moment of mindfulness that prevents a lot of frustration later, ensuring your finished piece feels as high-quality and intentional as you envisioned it to be.
Bringing Intention to Your Craft
Remember that the fabric you choose is more than just a material; it’s the tactile foundation of your home’s energy, so pick textures that invite you to slow down and feel present.
Don’t let the pursuit of perfection stifle your joy—the beauty of a handmade cushion lies in the soul and personal touch you pour into every single stitch.
View this project as a form of mindful movement, using the rhythmic nature of sewing to quiet the mental noise of a busy day and reconnect with your creative self.
## The Soul in the Stitch
“When we take the time to craft something for our homes with our own hands, we aren’t just making a cushion cover; we are stitching intention into the very fabric of our sanctuary, creating a soft place to land amidst the rush of the world.”
Sophia Reynolds
Creating Your Own Soft Sanctuary
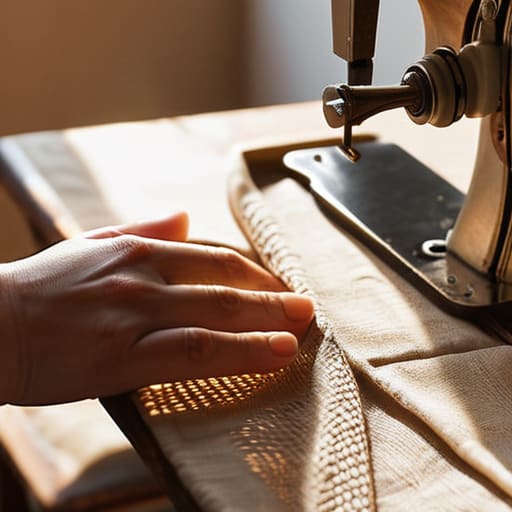
As we wrap up this little creative journey, I hope you feel a sense of pride in what you’ve accomplished. From selecting those soulful, tactile fabrics that speak to your senses to mastering the precision of your pattern and the rhythm of your stitching, you’ve done more than just follow a tutorial. You have intentionally transformed raw materials into something that brings comfort to your home. Remember, the secret to a beautiful cushion isn’t just in the straightness of the seams, but in the thoughtful intention you poured into every single stitch. By slowing down to craft these pieces yourself, you’ve turned a simple household object into a testament to your own patience and skill.
Beyond the thread and the fabric, I want you to remember why we do this in the first place. In our fast-paced, digital-heavy lives, there is something profoundly healing about the act of making. When you rest your head against a pillow you created with your own two hands, you aren’t just sitting on a cushion; you are sitting on a manifestation of your own presence. Let these handmade touches serve as a gentle reminder to pause and breathe amidst the chaos of your daily routine. You deserve a space that feels uniquely yours, built one mindful stitch at a time. Happy crafting, and enjoy the beautiful sanctuary you are building!
Frequently Asked Questions
I’ve got some beautiful vintage linens, but will they hold up if I use them for high-traffic sofa cushions?
Oh, I love that you’re working with vintage linens! There is something so soulful about breathing new life into old textiles. However, since you mentioned high-traffic sofa use, we should be mindful. Vintage fibers can be a bit more delicate than modern weaves. I’d suggest adding a sturdy cotton backing or using a heavy-duty interfacing inside. This way, you preserve that beautiful history while ensuring your sanctuary stays cozy and intact for years to come.
What’s the best way to add a hidden zipper so the finish looks professional and seamless?
There’s something so satisfying about those little details that make a piece feel truly high-end, isn’t there? To get that seamless, professional look, I always recommend an invisible zipper foot. Once you position your zipper face-down against the fabric, this specialized foot keeps you incredibly close to the teeth, ensuring the stitching stays tucked away. It’s a tiny bit of extra patience, but seeing that clean, uninterrupted line makes the whole project feel so much more intentional.
Should I consider adding a bit of extra filling or a different type of insert to make my homemade covers feel extra cozy?
Oh, I love that you’re thinking about this! It’s those little sensory details that turn a house into a sanctuary. Honestly, yes—the insert is where the soul of the cushion lives. If you want that cloud-like, “sink-in” feeling, I’d suggest a down or feather blend. It adds a layer of luxury that synthetic fills just can’t mimic. It’s all about creating that soft, tactile embrace to help you truly unwind.
