I remember sitting on my living room floor in my old apartment, surrounded by scraps of linen and a mounting sense of frustration, staring at a tiny, stubborn piece of metal that just wouldn’t cooperate. I had convinced myself that learning how to sew a zip was some sort of advanced, mystical skill reserved only for the masters, and every time I tried, I ended up with wavy fabric and a lot of self-doubt. But here is the truth I learned through a lot of trial and error: it isn’t about having magic fingers; it’s about slowing down and respecting the rhythm of the needle.
In this guide, I’m stripping away the intimidation and giving you the practical, gentle steps you actually need to succeed. We aren’t going to chase perfection, but we are going to focus on mindful precision so your projects feel sturdy and professional. I’ll walk you through my favorite foolproof techniques, from prepping your fabric to the final stitch, ensuring you feel completely empowered to tackle this task with calm and confidence. Let’s turn that sewing frustration into a moment of pure, creative flow.
Table of Contents
- Step-by-Step Instructions
- Mastering the Precision of a Sewing Machine Zipper Foot Tutorial
- Navigating Common Zipper Sewing Mistakes With Patience and Grace
- Small Acts of Precision: My Little Secrets for a Flawless Zip
- Embracing the Rhythm of the Stitch: My Final Thoughts
- ## Finding Flow in the Fine Details
- The Beauty of the Finished Stitch
- Frequently Asked Questions
Guide Overview
Tools & Supplies
- Sewing machine with a zipper foot
- Fabric scissors for precise cutting
- Seam ripper for corrections
- Zipper of appropriate length
- Fabric pieces for the project
- Matching thread
Step-by-Step Instructions
- 1. Before we even touch the machine, let’s take a second to prepare our workspace. I find that a cluttered desk often leads to a cluttered mind, so clear a little space and gather your zipper, your fabric, and some matching thread. Press your fabric edges with an iron first; it might feel like an extra step, but those crisp, flat edges are what will prevent frustration later on.
- 2. Now, let’s find our center by positioning the zipper. Lay your fabric face down, and place the zipper face up on top of it, making sure the teeth are aligned with the opening. I like to use a bit of wonderous precision here, so use plenty of sewing pins to hold everything in place. This prevents the fabric from shifting and keeps your energy focused rather than frantic.
- 3. Once everything is secure, it’s time to start the actual stitching. Start sewing from the bottom of the zipper tape, keeping your needle about 1/8th of an inch away from the zipper teeth. I always tell my clients that patience is a practice, so take your time with this first few stitches to ensure your line is straight and steady.
- 4. As you move up the zipper, make sure you are keeping a consistent distance from the teeth. If you find your mind wandering to your to-do list, just take a deep breath and bring your attention back to the rhythmic hum of the machine. This is a wonderful moment for a mini-meditation, focusing entirely on the tactile sensation of the fabric under your fingers.
- 5. When you reach the top of the zipper, you’ll want to backstitch a few times to secure the end. This creates a strong anchor so the zipper doesn’t pull away during use. Think of this as setting an intention for the strength of your garment; we want it to be as resilient as we strive to be in our daily lives.
- 6. After you’ve finished the stitching, it’s time to flip your work right-side out. This is such a rewarding moment! As you turn the fabric, you’ll see the zipper nestle perfectly into place. If there are any little wrinkles, give them a gentle press with your iron to smooth out the edges, leaving you with a professional, seamless finish.
Mastering the Precision of a Sewing Machine Zipper Foot Tutorial
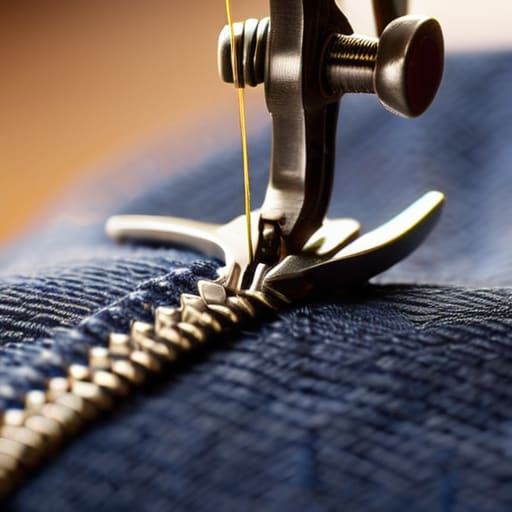
Once you’ve conquered the basic steps, I want to invite you to lean into the nuance of the craft. If you’re feeling a bit intimidated by the mechanics, remember that this specific sewing machine zipper foot tutorial isn’t just about technical accuracy; it’s about building a sense of rhythmic confidence. Using the dedicated zipper foot allows you to get much closer to the teeth, which is essential for a professional finish. I remember my first attempt at a dress—I was so rushed that I missed the precision needed, and let me tell you, that frustration is a great teacher! Taking that extra beat to ensure your foot is properly aligned can save you so much heartache later.
When you move into more complex projects, like sewing zipper on heavy fabric, the physical resistance can feel a bit overwhelming. If you feel the machine straining, don’t fight it; instead, try adjusting your sewing machine settings for zippers by slowing down your stitch speed. It’s much like a mindfulness practice—when things get heavy or difficult, we don’t push harder; we breathe and move more intentionally.
Navigating Common Zipper Sewing Mistakes With Patience and Grace
Even when we approach our projects with intention, things don’t always go perfectly on the first try. I remember one afternoon in my old corporate office, trying to fix a torn bag during my lunch break—I was so rushed that I ended up with a jagged, wavy line. It felt like such a failure in the moment! But in sewing, as in life, these little hiccups are just opportunities to slow down. When you encounter common zipper sewing mistakes, like the teeth getting caught in the seam allowance, please don’t be hard on yourself. Instead, take a deep breath, unpick that section with care, and try again.
Sometimes the frustration comes from the technical side, like when you’re sewing a zipper on heavy fabric and the machine just won’t cooperate. If you feel that tension rising, it might be time to adjust your sewing machine settings for zippers or simply step away for a quick mindfulness break. A little bit of patience and a fresh perspective can turn a frustrating snag into a moment of true craftsmanship.
Small Acts of Precision: My Little Secrets for a Flawless Zip
- Treat your zipper like a delicate conversation; always press the teeth flat with an iron before you even think about touching the sewing machine. It’s much easier to find your rhythm when the fabric is cooperating with you from the start.
- Think of your seam allowance as your personal boundary. Using a bit of wash-away hem tape can act like a gentle guide, keeping that zipper perfectly aligned so you aren’t fighting against the fabric mid-stitch.
- Don’t forget the power of a slow breath—and a slow needle. When you’re working close to those metal teeth, slowing down your sewing speed helps you stay present and prevents those tiny, frustrating wobbles that can throw off your whole flow.
- I always tell my clients that preparation is half the battle, and the same goes for sewing. Pinning your zipper in place isn’t just a technical step; it’s a moment to ground yourself and ensure everything is exactly where it needs to be before you commit.
- A quick wellness tip for your sewing kit: keep a small piece of scrap fabric nearby to test your tension. Just like we check in with our emotional state before a big meeting, checking your stitch tension ensures you won’t face any unexpected tension later on.
Embracing the Rhythm of the Stitch: My Final Thoughts
Remember that precision isn’t about perfection; it’s about the intention you bring to each small movement, allowing yourself the grace to slow down when the fabric demands it.
View every technical hurdle, like a misaligned zipper or a skipped stitch, as a gentle invitation to practice patience and reconnect with your creative flow.
Celebrate the small wins, because mastering a skill as tactile as sewing is a beautiful way to practice mindfulness and find harmony between your hands and your heart.
## Finding Flow in the Fine Details
“Learning to sew a zipper isn’t just about mastering a technical skill; it’s a beautiful lesson in patience. It reminds us that when we slow down, align our intentions with our actions, and embrace the tiny, intricate details, we create something that isn’t just functional, but truly seamless.”
Sophia Reynolds
The Beauty of the Finished Stitch
As we bring this project to a close, I want you to take a moment to really look at what you’ve accomplished. We’ve journeyed through the technicalities of aligning your fabric, the intentionality of using a specialized zipper foot, and the necessary patience required to navigate those inevitable little hiccups along the way. Remember, sewing a zipper isn’t just about the mechanical act of joining two pieces of cloth; it’s about the deliberate practice of precision and the ability to troubleshoot with a calm mind. By mastering these small, technical steps, you aren’t just fixing a garment—you are building a foundation of creative confidence that will serve you in every stitch you take from here on out.
Beyond the thread and the fabric, I hope you carry this sense of accomplishment into the rest of your day. There is something so profoundly grounding about working with our hands and seeing a tangible result of our focus and effort. Life, much like sewing, often presents us with uneven edges or moments where things don’t quite line up on the first try, but we have the power to pause, breathe, and adjust. So, as you fasten that final stitch, let it be a reminder that you are capable of handling complexity with grace. Keep creating, keep learning, and most importantly, be kind to yourself throughout the process.
Frequently Asked Questions
Is there a way to sew a zipper into delicate or sheer fabrics without it looking bulky or causing the material to pucker?
Oh, I hear you—working with sheer fabrics can feel a little intimidating, like you’re handling a delicate dream! To prevent that dreaded puckering, I highly recommend using a lightweight invisible zipper. Before you even touch the machine, try using a bit of water-soluble stabilizer to support the fabric. It provides that much-needed structure without leaving a trace. Just remember to breathe; treat the fabric with kindness, and it will surely follow your lead.
How can I tell if I'm using the right type of zipper for my project, like choosing between a hidden zipper and a standard coil zipper?
Choosing the right zipper is a bit like choosing the right mindfulness practice—it all depends on the intention behind your project. If you’re looking for something seamless and unobtrusive, like on a delicate summer dress, a hidden zipper is your best friend. But if you need something sturdy and reliable for a casual tote or a jacket, a standard coil zipper offers that dependable strength. Just pause, look at your fabric’s weight, and listen to what the garment truly needs.
What are some gentle ways to handle a zipper that keeps getting stuck or catching on the fabric while I'm sewing?
Oh, I’ve been there more times than I’d like to admit! When a zipper starts acting up, it’s easy to feel that surge of frustration. Instead of forcing it, try pausing for a deep breath. A little bit of beeswax or even a plain graphite pencil rubbed along the teeth can work wonders as a natural lubricant. It’s all about working with the material, not against it, allowing that flow to return to your rhythm.
