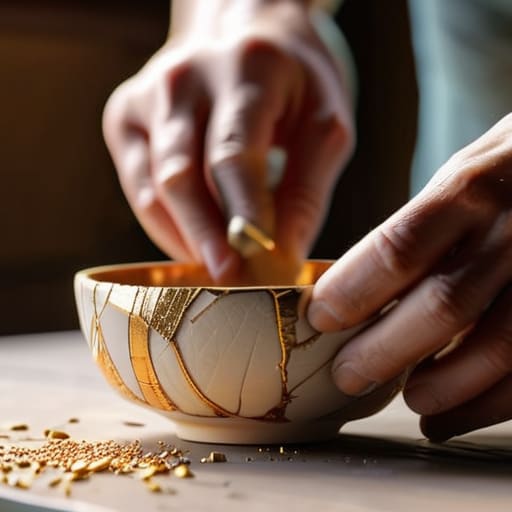
I remember sitting on my kitchen floor in my tiny first apartment, surrounded by the jagged, colorful remains of my favorite hand-painted mug. It felt like more than just a broken dish; it felt like a tiny, sharp metaphor for how my life was spiraling during that high-stress corporate season. We often think that once something loses its integrity, it’s destined for the trash, but I’ve learned that knowing how to fix a broken ceramic is actually a beautiful lesson in resilience. Instead of rushing to sweep the pieces away in a moment of frustration, I’ve found that if we slow down, we can actually find a way to restore the beauty that was lost.
In this guide, I’m stripping away the complicated jargon to give you a clear, gentle roadmap for mending your treasures. We’re going to walk through the practical, step-by-step process of choosing the right adhesives and aligning those tricky edges without the stress. My goal is to move you past the overwhelm and into a space of mindful restoration, where you can transform a broken moment into a piece that tells an even deeper story. Let’s get started.
Table of Contents
Guide Overview
Tools & Supplies
- Sandpaper (fine grit for smoothing edges)
- Small brush (for applying adhesive)
- Painter's tape (to hold pieces in place)
- Ceramic adhesive or Cyanoacrylate (1 tube)
- Rubbing alcohol (small amount for cleaning)
Step-by-Step Instructions
- 1. Before we even touch the pieces, I want you to take a moment to gather your supplies and clear a workspace. You’ll need a high-quality clear adhesive (I personally love a specialized ceramic glue), some painter’s tape, a soft microfiber cloth, and perhaps a small bowl of water. Creating a dedicated, calm space for this task helps prevent the frustration of searching for a tool mid-process.
- 2. Once you’re ready, carefully examine every single shard. I find it helpful to lay them out on a white towel so nothing rolls away, but the real work is in cleaning the edges. Use a damp cloth to wipe away any dust or oils; if the surfaces aren’t pristine, the bond won’t hold, and we want this repair to last a lifetime.
- 3. Now, let’s begin the delicate dance of reassembly. Apply a very thin, even layer of adhesive to just one edge of a fragment. A common mistake is using too much, which creates a messy bulge, so think of it like applying a gentle touch rather than a heavy hand. Slowly bring the pieces together, pressing them firmly but patiently into place until you feel them seat correctly.
- 4. If you’re working with a piece that has a complex shape, you might find it wants to slide out of alignment. This is where my old yoga instructor’s advice comes in handy: hold steady. Use small strips of painter’s tape to bridge the gaps and hold the pieces in their new home while the glue sets. This provides the stability needed for the bond to cure without shifting.
- 5. As you move through the pieces, take a deep breath if you feel your tension rising. If a shard doesn’t seem to fit perfectly, don’t force it; sometimes we have to re-evaluate our approach just like we do with our daily habits. Once everything is aligned, let the piece sit undisturbed for at least twenty-four hours. This period of stillness is crucial for a truly structural mend.
- 6. Finally, once the glue is completely dry, take a moment to admire the work. If there are any tiny dried glue residues on the surface, you can gently buff them away with a soft cloth. Don’t be discouraged by the visible seam; in many cultures, there is a beautiful concept called Kintsugi, where we celebrate the repair as part of the object’s history. Your ceramic is now stronger and more storied than it was before it broke.
Embracing the Ceramic Bonding Process With Intention

As you sit there with the pieces spread out before you, I want to invite you to shift your perspective. Instead of seeing this as a chore or a way to hide a mistake, try viewing the ceramic bonding process as a meditative ritual. I remember a particularly stressful week back in my corporate days when I accidentally knocked over my favorite tea mug. Instead of rushing to clean it up, I sat down, breathed, and decided to treat the repair as a moment of mindfulness. When you are carefully applying epoxy resin for ceramics, focus on the sensation of the movement and the quiet stillness of the room. This isn’t just about fixing an object; it’s about practicing patience with yourself and your surroundings.
While you work, remember that the quality of your tools dictates the longevity of your peace. If you’re working on a piece meant for your morning ritual, please ensure you are using a food safe ceramic adhesive to keep your sanctuary truly healthy. Whether you are repairing porcelain chips or larger structural breaks, let the precision of your movements ground you. Slow down your breathing as you align the edges; when we approach restoration with intention, we turn a broken moment into a beautiful testament to resilience.
Mastering Ceramic Restoration Techniques for Lasting Beauty

As you move into the finer stages of this journey, I want to share a little secret I learned during my time as a wellness consultant: the quality of our tools often reflects the quality of our intention. When you are working on repairing porcelain chips or those tiny, hairline fractures that seem to defy logic, don’t settle for anything less than high-quality materials. If the piece you are mending is a beloved tea cup or a salad bowl, please, please ensure you are using a food safe ceramic adhesive. There is nothing quite as jarring as realizing your favorite morning ritual is being interrupted by the realization that your glue isn’t quite up to the task of keeping your food safe.
Beyond just the glue, mastering true ceramic restoration techniques involves a bit of patience and a steady hand. Sometimes, a simple bond isn’t enough, and you might find yourself reaching for a specialized epoxy resin for ceramics to fill in those small gaps where material has been lost. I like to think of this stage as the “polishing” phase of our mindfulness practice—it’s where we refine our efforts and turn a moment of breakage into a masterpiece of resilience. Take your time, breathe through the frustration, and let the beauty of the mend shine through.
Small Rituals for a Seamless Restoration
- Before you even reach for the glue, take a moment to organize your space. Creating a clean, calm workspace isn’t just about preventing a mess; it’s about setting a mindful intention for the healing process of your object.
- Think of cleaning the edges as a way of clearing mental clutter. Use a gentle touch with isopropyl alcohol to ensure every tiny fragment is pristine, because just like in our lives, we can’t build something strong on a foundation that isn’t clear and ready.
- Don’t rush the “dry time.” I know how tempting it is to want to see the finished result immediately, but true transformation requires patience. Give the adhesive time to settle, much like how we need stillness to let our own lessons sink in.
- Use a tiny, precise applicator rather than squeezing directly from the tube. It’s all about the micro-movements; being intentional with small actions prevents overwhelm and ensures the repair is as graceful as possible.
- Embrace the “imperfection” of the seam. If a tiny line remains visible, don’t see it as a failure. See it as a “kintsugi” moment—a beautiful reminder that there is strength and unique character in things that have been broken and mended.
Finding Meaning in the Mending Process
Remember that the goal isn’t just to erase the damage, but to honor the history of the object; a repaired piece carries a unique story of resilience that a perfect one simply doesn’t have.
Treat the restoration as a moving meditation, allowing the slow, tactile nature of the work to ground you in the present moment and quiet the noise of a busy day.
View these small acts of repair as a metaphor for self-care—sometimes we need to take our time, apply a little patience, and carefully piece ourselves back together to find our new strength.
The Beauty in the Break
“When something we love shatters, our first instinct is to see only the loss, but I’ve learned that there is a profound, quiet strength in the mending; just as we heal our own fractured moments through patience and grace, a repaired ceramic piece carries a story far more beautiful than one that has never known a crack.”
Sophia Reynolds
The Beauty in the Broken
As we wrap up this journey of restoration, I hope you feel more confident in your ability to breathe life back into those shattered pieces. We’ve walked through the delicate process of cleaning each fragment, selecting the right adhesive, and applying those precise techniques to ensure a bond that lasts. Remember, it wasn’t just about the glue or the steady hand; it was about the patience and intention you brought to every single movement. By combining careful preparation with a mindful approach to the bonding process, you haven’t just repaired an object—you have practiced the art of slow, deliberate restoration.
Looking at your mended ceramic piece now, I want you to see more than just a fixed item. I want you to see a metaphor for our own lives. We all face moments where we feel fractured, overwhelmed, or completely undone by the pressures of a fast-paced world. But just like these ceramic fragments, our cracks don’t have to define us; they can become the very places where we find our newfound strength and character. Take a moment to appreciate the scars, for they are proof that you had the resilience to mend yourself and start again, more beautiful than before.
Frequently Asked Questions
Is it actually safe to use my favorite vintage ceramic pieces for eating or drinking once they've been repaired?
That is such a thoughtful question, and honestly, it’s one I get a lot! While the repair process is incredibly healing, I always recommend a “look before you leap” approach. If you’re using food-safe, non-toxic epoxy, you’re likely fine for decorative pieces. However, for something you actually sip from, I’d suggest keeping it as a beautiful display piece instead. Your safety and peace of mind are much more important than a single cup of tea.
How can I tell if a crack is too far gone to save, or if it's worth the emotional energy to try and mend it?
That is such a profound question, and honestly, it’s one we face in our lives more often than we realize. Before you pick up the glue, take a moment to sit with the piece. If the fragments are too pulverized to hold a shape, or if the thought of mending it feels like a heavy burden rather than a healing ritual, it might be time to let go. Sometimes, honoring something means releasing it.
If I accidentally make a mistake during the bonding process, is there a way to gently undo it and start again?
Oh, please don’t beat yourself up! I’ve certainly been there—staring at a misplaced shard and feeling that sudden surge of panic. If the glue hasn’t fully set, you can gently nudge the piece back into place using a wooden toothpick. If it’s already tacky, take a deep breath. Use a cotton swab dipped in a tiny bit of warm water or rubbing alcohol to soften the bond. It’s okay to reset; perfection isn’t the goal, presence is.