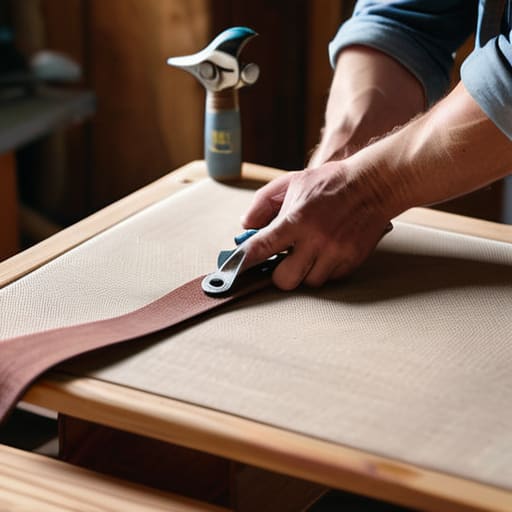
I remember sitting on the floor of my first tiny apartment in San Francisco, staring at a cold, white wall and feeling completely unmoored. I had all the “productivity hacks” in the world, but my space felt hollow, lacking that essential sense of grounding I so desperately needed to recharge. I realized then that we often think professional-grade home decor requires a massive budget or a degree in design, but that’s a total myth. Learning how to make a headboard isn’t actually about expensive lumber or complex carpentry; it’s about the intentional act of creating an anchor for your most sacred space—your bed.
In this guide, I’m stripping away the intimidation factor to show you how to approach this project with a mindful, steady hand. I won’t overwhelm you with jargon or impossible blueprints; instead, I’ll share a practical, step-by-step roadmap to help you craft something beautiful that truly reflects your soul. Whether you’re looking for a minimalist wooden frame or something soft and upholstered, you’ll find the honest, no-hype guidance you need to turn a simple DIY task into a deeply rewarding ritual of self-care and home sanctuary building.
Table of Contents
- Step-by-Step Instructions
- The Foundation of Comfort Wooden Headboard Frame Construction
- Choosing Your Texture an Upholstery Fabric Selection Guide
- Small Details, Big Soul: 5 Ways to Infuse Your Headboard with Intention
- Bringing Your Vision to Life: My Final Thoughts
- More Than Just Wood and Fabric
- Bringing Your Vision to Life
- Frequently Asked Questions
Guide Overview
Tools & Supplies
- Drill/Driver for securing frame and upholstery
- Staple Gun for attaching fabric and foam
- Measuring Tape for precise dimensions
- Hand Saw or Miter Saw for cutting wood
- Wood planks (2x4s or pine boards) for the frame
- Plywood sheet for the backing
- Foam padding for cushioning
- Upholstery fabric for covering
- Wood screws for assembly
Step-by-Step Instructions
- 1. Before we dive into the physical labor, I want you to take a moment to curate your materials with intention. You’ll need a sturdy piece of plywood for the base, some high-density foam for that cloud-like comfort, batting to smooth everything out, and your chosen fabric. I always suggest choosing a textile that feels good against your skin, because your bedroom should be a sensory sanctuary, not just a room.
- 2. Once you have your supplies, it’s time to prepare your canvas by cutting the plywood to your desired dimensions. I find that measuring twice and cutting once is a wonderful way to practice mindful precision; it forces you to slow down and truly focus on the task at hand. Make sure the edges are sanded down until they are perfectly smooth to prevent any accidental snags on your beautiful new fabric.
- 3. Now, let’s add the layer of comfort by applying your foam to the wood. Use a spray adhesive to secure the foam, working in small sections to ensure it stays put. I like to think of this step as building the foundation of your rest; just as we build our mental resilience, we are creating a solid, supportive base for your nightly rejuvenation.
- 4. Next, we wrap the entire structure in batting. This is a crucial step because it softens the edges and gives the headboard that luxurious, high-end look you see in boutique hotels. Pull the batting taut—but not so tight that it creates tension—and staple it to the back of the plywood, working your way around the perimeter like you’re closing a circle of calm.
- 5. This is where your personal style truly comes to life: draping the fabric. Lay your fabric face down on a clean floor, place your headboard foam-side down on top of it, and begin pulling the material over the edges. The secret to a professional finish is to maintain consistent tension as you staple; it’s a bit like a deep breathing exercise—steady, rhythmic, and controlled.
- 6. As you reach the final corners, take your time to fold the fabric neatly, much like you would fold a piece of laundry. I always tell my clients that the small details are where the magic happens. Once the fabric is secure and the back is tidy, you’ll have a piece that isn’t just furniture, but a handcrafted testament to your ability to create beauty from scratch.
The Foundation of Comfort Wooden Headboard Frame Construction

When we talk about building something with our hands, it’s easy to get caught up in the aesthetics and forget that the strength of the piece lies beneath the surface. During my years as a corporate wellness consultant, I saw so many people neglect the “structural” side of their lives—the boundaries and habits that hold everything up. The same applies here. When you’re diving into wooden headboard frame construction, think of the frame as your foundation. I always recommend using solid wood rather than particle board; it’s much more forgiving when you’re sanding, and it provides that sturdy, reliable feeling every time you lean back to read.
As you assemble your pieces, pay close attention to the joints. A wobbly frame can be incredibly frustrating, especially if you eventually decide to follow a diy upholstered headboard tutorial to add some softness. To ensure your hard work stays put, don’t skimp on the headboard mounting hardware. Using high-quality bolts or brackets ensures that your sanctuary remains stable and secure, allowing you to truly unwind without a single distraction.
Choosing Your Texture an Upholstery Fabric Selection Guide

Once you’ve mastered the wooden headboard frame construction, the real magic begins with the tactile experience. Think of your fabric not just as a covering, but as the sensory soul of your bedroom. When I was working as a corporate wellness consultant, I realized how much our physical environment influences our cortisol levels; a scratchy, cheap fabric can subtly keep your nervous system on edge. For a truly restorative sleep sanctuary, I always recommend leaning into natural fibers like linen or organic cotton. They breathe beautifully and offer that soft, lived-in feel that invites you to finally exhale after a long day.
If you’re looking for something a bit more durable—perhaps if you have pets or kids who love to lounge against the bed—a high-quality velvet or a heavy weave polyester can be a game-changer. This part of your upholstery fabric selection guide is all about balancing aesthetics with the reality of your daily life. Don’t forget to consider the “hand” of the fabric—that’s how it feels against your skin. Choosing a textile that feels luxuriously soft ensures that your DIY project isn’t just a visual win, but a tactile embrace.
Small Details, Big Soul: 5 Ways to Infuse Your Headboard with Intention
- Measure twice, but breathe once. It’s so tempting to rush into the cutting phase when you’re excited, but taking a mindful moment to double-check your dimensions ensures your sanctuary fits perfectly without the stress of last-minute corrections.
- Don’t fear the “imperfections.” When I was working in the corporate world, I used to strive for sterile perfection, but in DIY, a slightly uneven grain or a hand-stitched seam adds character and reminds you that a human hand—your hand—created this peace.
- Prioritize the tactile experience. Since your headboard is the first thing you see when you wake and the last thing you touch at night, choose materials that feel grounding; think soft linens or velvet that invite you to slow down and settle in.
- Think about the “energy flow” of your room. Before you nail that final piece, step back and look at the whole space; your headboard shouldn’t just be a piece of furniture, it should act as an anchor that harmonizes with the light and movement of your bedroom.
- Keep a “wellness kit” nearby while you work. DIY can be therapeutic, but it can also be taxing; having your favorite herbal tea or a calming playlist ready turns the construction process from a chore into a meditative ritual of creation.
Bringing Your Vision to Life: My Final Thoughts
Remember that your headboard is more than just furniture; it’s a tactile anchor for your sanctuary, so choose materials that invite you to exhale the moment you lean back.
Don’t let the pursuit of perfection steal your joy—the beauty of a DIY project lies in the intentionality and the soul you pour into every measurement and stitch.
Approach the construction process as a mindfulness practice, allowing the rhythm of building to ground you even as you create something beautiful for your home.
More Than Just Wood and Fabric
“When you set out to build your own headboard, you aren’t just assembling a piece of furniture; you are intentionally crafting the backdrop to your most restorative moments, turning a simple sleeping space into a sacred sanctuary for your soul to rest.”
Sophia Reynolds
Bringing Your Vision to Life
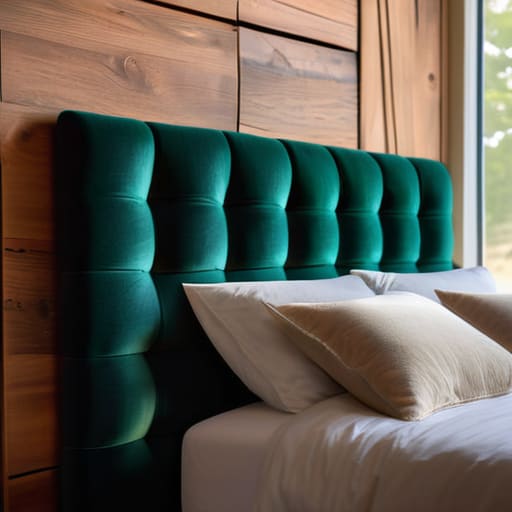
As we wrap up this journey of creation, take a moment to look at what you’ve accomplished. You’ve moved from the structural integrity of a sturdy wooden frame to the tactile, sensory delight of selecting the perfect upholstery. Whether you opted for a rugged, reclaimed wood look or a lush, velvet finish, you haven’t just followed a set of instructions; you have curated a focal point for your most personal space. By focusing on both the strength of the foundation and the softness of the texture, you’ve ensured that your headboard is as durable as it is beautiful. Remember, the magic lies in the details—the way the fabric catches the morning light or how the wood grain tells its own silent story.
Beyond the sawdust and the sewing needles, I hope you realize that this project was about something much deeper than furniture. In our fast-paced, digital-first lives, taking the time to build something with your own two hands is a profound act of intentional living. You’ve carved out a space for mindfulness and patience, turning a simple DIY task into a ritual of self-care. As you lay your head down tonight against your new creation, I hope you feel a sense of immense pride. You didn’t just make a headboard; you built a sanctuary that honors your need for rest, beauty, and a truly balanced home.
Frequently Asked Questions
How can I ensure my DIY headboard is sturdy enough to lean against without wobbling or pulling away from the wall?
There is nothing more jarring than a beautiful sanctuary that feels flimsy when you lean back to read. To ensure stability, I always recommend anchoring your frame directly into the wall studs using heavy-duty L-brackets. It’s a bit like finding your center in meditation—it provides that essential grounding. Also, don’t skimp on the joinery; using wood glue and structural screws at every connection point will prevent that frustrating wobble and keep your space feeling secure.
What are some beginner-friendly ways to add a bit of "soul" or personality to the design if I'm not feeling particularly handy with power tools?
Honestly, I used to think you needed a workshop full of power tools to make something feel special, but that’s just not true. If the heavy lifting feels daunting, lean into the “soft” design elements. Think about draping a vintage textile over your frame or even incorporating a few meaningful elements like a collection of brass studs or a beautiful, hand-woven macramé hanging. It’s about those small, intentional layers that turn a piece of furniture into a reflection of you.
Since I'm focused on creating a calming sanctuary, are there specific fabric types that are better for maintaining a peaceful, cozy atmosphere while still being durable?
Oh, I love that you’re thinking about the sensory experience! When we’re designing a sanctuary, texture is everything. For that “cloud-like” cozy feeling, I always lean toward linen blends or soft cotton velvets. They feel incredibly grounding against the skin. If you’re worried about durability—especially if you love to lounge and read in bed—look for performance linens. They offer that beautiful, organic aesthetic but are surprisingly resilient, keeping your peace intact for years.
